Thursday, May 30, 2013

Rain Gardening (or more accurately, gardening IN the rain...)


Photo credit: Bill Larson
Yesterday I spent a couple of hours in the pouring rain, planting and harvesting at one of the gardens I help tend.  I work this one with fellow Master Gardeners and we donate all the produce to our local Food Bank.   It’s on property managed by our Fire Department, who graciously allows us to have 8 raised beds and to store our materials and tools inside the building. 

 
Photo credit:  Bill Larson
 But, this post is about working in the rain.  I am a self-declared fair-weather gardener, without a doubt.  I don’t like to be cold and wet and really detest soggy feet.  It’s one of the reasons I’ll never be a farmer—those people are amazing!  Usually, when the sky is dripping and the temperature is below 60, I find something else to do and pretend I don’t see the garden.  The weather changes quickly around here, so it’s rarely a problem to skip a day.  That works just fine for my home garden, but we only meet once a week at the Fire Dept. and had already missed last week due to rain and wind.  We really needed to get some stuff done this week. 

I headed out feeling pretty grumpy about the whole thing, wearing boots and a hat and raincoat, wishing I’d put on rain pants.  I got out of my car into a downpour to greet my garden cohort Judy,  and was instantly soaked.  She took one look at me and we both started laughing like crazy.  After that, it was great—we couldn’t get any wetter, so just jumped in and started slogging through ankle deep puddles. 
Photo credit:  Judy Guttormson
Now the tomatoes are snugly planted in their tunnel, the lettuce and spinach are all harvested, succession crops are planted and what’s left of the peas are protected from the marauding bunnies.  And I got to go home and put on dry socks.

Photo credit:  Judy Guttormson

Tuesday, May 21, 2013

Vegetable Gardening Classes for the PNW


We all know that there are several styles of learning.  Some folks retain information from reading material, some from hearing it and some do best with a hands-on experience.  Here's a list of my upcoming classes through Poulsbo Parks & Recreation.  Some are hands-on and all involve both visual and auditory presentations. 
 
You can register for any (or all!) of these classes by calling Poulsbo Parks & Recreation at 360 779 9898.
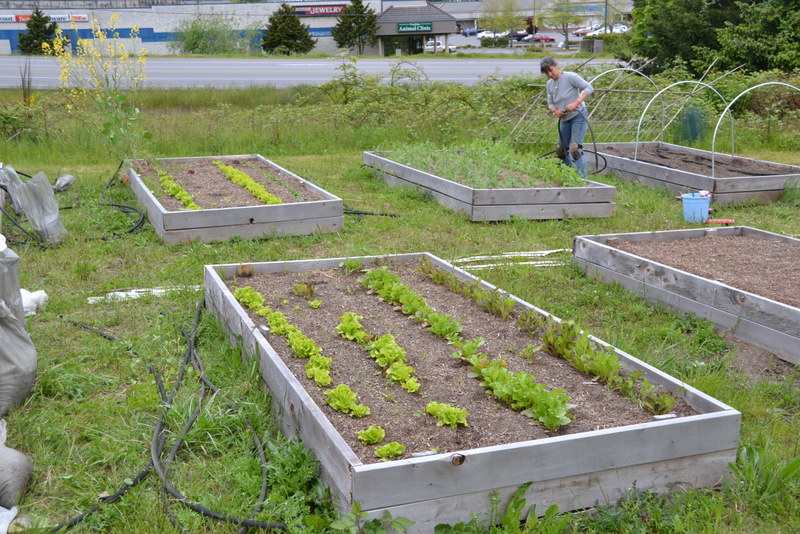
 

Intro to Crop Rotation and Succession Planting

Some of the most confusing things about vegetable gardening are deciding what and when to plant for healthy plants and continuous harvests.   Crop rotation helps prevent disease and pest problems, as well as balance soil nutrient levels and structure.  Succession planting is a system for timing your harvests to fit your needs. 

Thursday, May 23  6:30 to 8:00 PM
Poulsbo Parks & Rec building
$19

Organic Vegetable Gardening—Tips and Tricks for Terrific Tomatoes

Learn the tricks and techniques successful gardeners use to ripen tomatoes and peppers in our chilly NW summers. Topics include: timing, varieties, protection from the weather & disease and harvesting tips.  Plant starts available for sale at the class.

Saturday, May 25  10:00 to 11:30 AM
Pheasant Fields Farm, Silverdale
$19
 
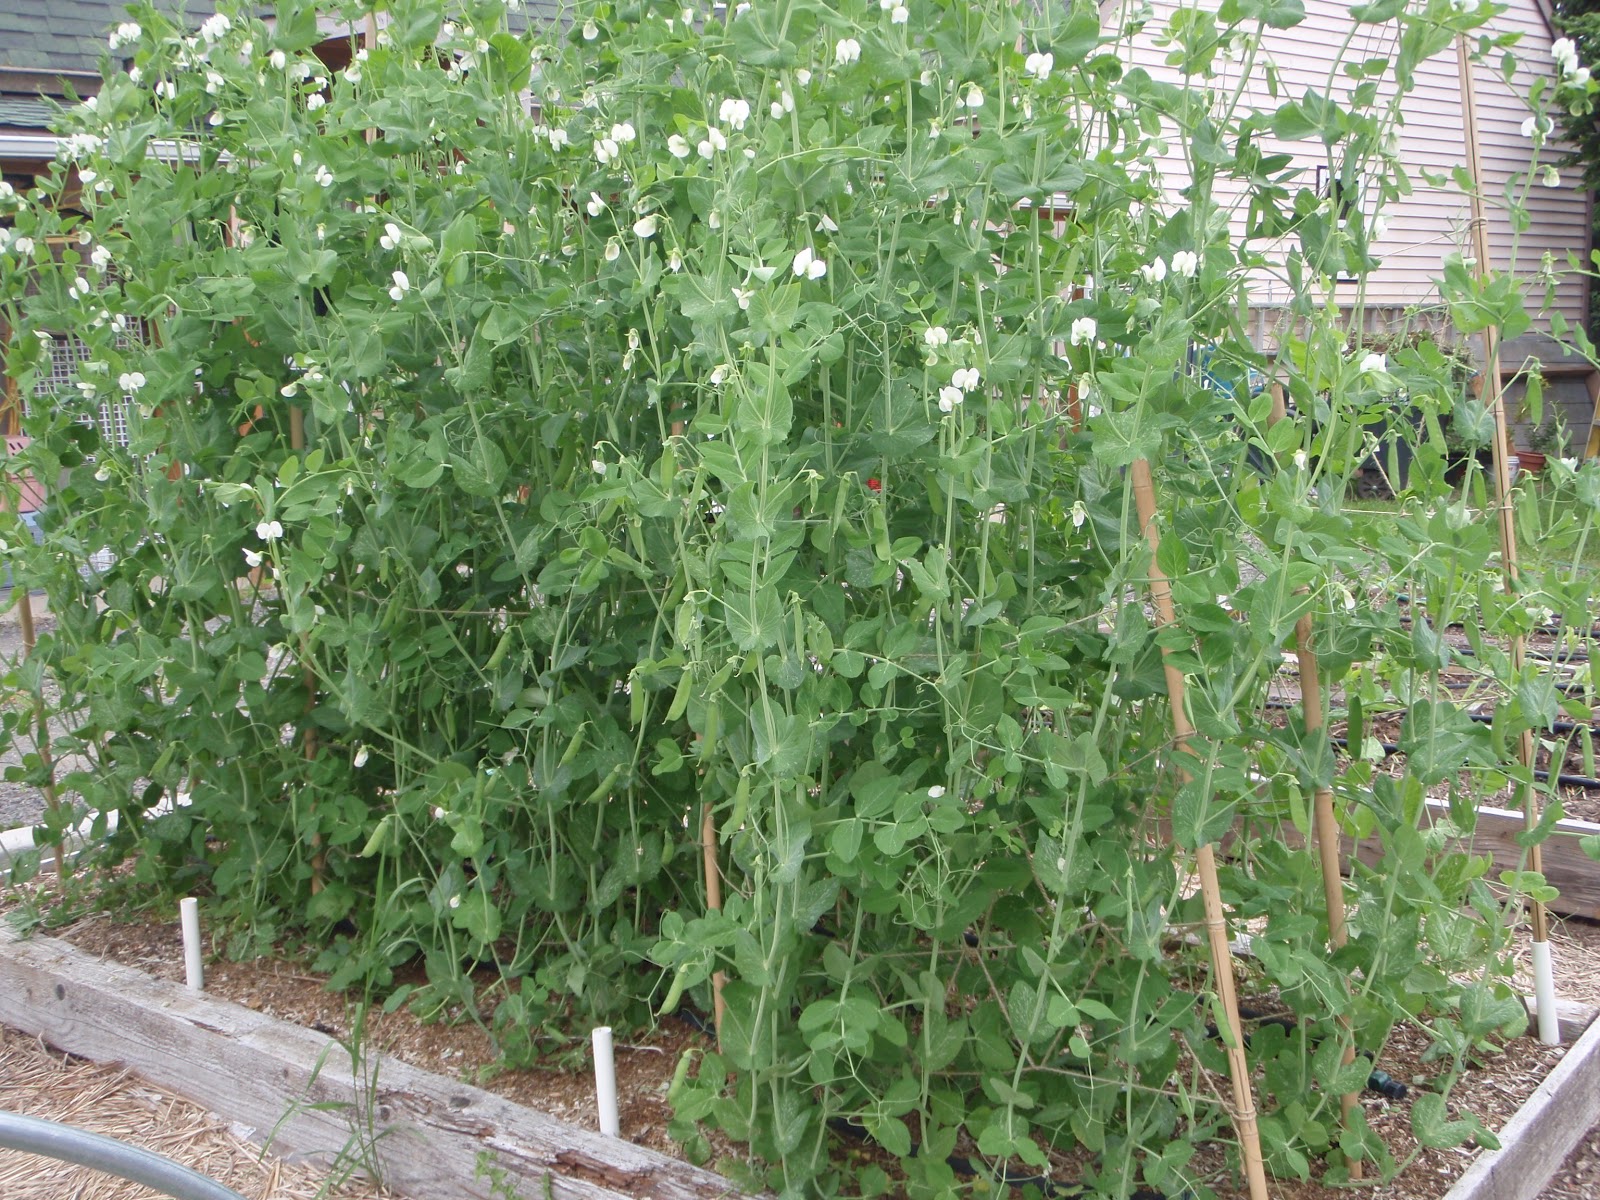
Organic Vegetable Gardening—Grow Your Own Salad Bowl!

Learn what vegetables you can plant together in one container to harvest complete salads! Students will plant and take home their own Salad Garden Bowl. Plants and materials provided.

Saturday, June 1  9:30 to noon
Poulsbo Parks & Rec building
$37

Organic Vegetable Gardening—Container Gardening

No room for a garden plot? You can still grow lots of great veggies on your patio or deck in containers! Learn what to look for in a container, what kinds of soil to use and which vegetables to choose. You’ll be surprised at what you can grow in a small space!

Saturday, June 8  10:00 to noon
Poulsbo Parks & Rec building
$19

Organic Vegetable Gardening—Grow Your Own Herb Garden Bowl

Here is a fun opportunity to celebrate Dad’s day with your child, or to make a gift together for that special someone!  Make your own herb garden and learn what to do to keep it happy and providing you with fresh herbs year-round.  Planting bowl and potting soil provided, students will choose and purchase plants at the class.

Saturday, June 15  9:00 to noon
Pheasant Fields Farm, Silverdale
$29

Fall/Winter Gardening

Want to be harvesting parsnips and kale all winter?  Broccoli and cabbage in early spring?  It feels too early, but NOW is the time to start planning and planting your fall/winter garden!  Topics covered include plant choices, timing and protection from winter weather.  Plant starts available for sale at the class.

Saturday, June 22  10:00 AM to noon
Pheasant Fields Farm, Silverdale
$29

Saving Seeds from Your Garden

By saving seeds from your garden vegetables, you can save money and develop plants that are exactly suited to your specific growing conditions.  Learn to select the best plants for seed saving, collection techniques and storage methods.

Thursday, July 25 6:30 to 8:00 PM
Poulsbo Parks & Rec building
$19

I'll also be participating as a WSU Kitsap Extension Master Gardener Volunteer Educator on July 13th, presenting a one day class on Fall/Winter Gardening.  This is a follow-up to a 4 day course on Organic Vegetable Gardening held in February and March, but everyone is welcome to attend.  We'll start at the Norm Dicks Building in Bremerton, then head out to Blueberry Park after lunch to get our hands dirty in the gardens there.  The cost is $45 and you can get more information and register online.  There are a lot of events on the page, so you may have to scroll down to find it.

Monday, May 13, 2013

Ripening Tomatoes in the Pacific Northwest


So, I LOVE living in Western Washington—'wouldn’t want to live anywhere else in the country.  But I also LOVE tomatoes, which aren’t quite as fond of the climate as I am.  So, here are a few of the tricks I’ve learned to have my tomatoes and eat them too... 

Choose the right varieties!  If the catalog or seed packet says it will take more than 85 days to mature, you might want to start building that heated greenhouse... 
 
Keep them warm!  Tomatoes are tender, tropical plants and especially annoyed by the 20-30 degree drop in temperature we often have between day and night.  Cover them up, make use of reflected heat, move them around in containers, but keep them warm.

Keep them dry!  We live in the fungus capital of the world and some of those fungi prey on tomato plants.  Remember the Irish potato famine?  It’s called Late Blight when it attacks tomatoes.  Avoid overhead watering (or rain), mulch to prevent spores from splashing from the soil to the leaves, prune judiciously to encourage good air circulation.
 
 
Just a couple months later.  Definitely in need
of that judicious pruning!


Planted in tunnel cloche


Keep them focused!  Given their druthers, indeterminate tomato plants will grow and grow and grow and...  Pinch off suckers to direct energy to flowers and fruit making.  Towards the end of the season, remove all the new flowers and teensy fruit that won’t have time to ripen.

Make them just a little nervous!  The main goal of any plant is to make seed and reproduce.  As the season winds down towards fall, start reducing the water to stress the plants just enough to make them concentrate on ripening the fruit and making seeds in case something dreadful happens. 

And remember, if the first frost is threatening and there are still green fruits on the plants, you can pick them and ripen them in the house.   They won’t be quite the same, but they’ll still be better than the ones flown in from other parts of the world.

Wednesday, February 13, 2013

Planning the Vegetable Garden


Grab your pencil, tape measure and boots—it’s time to figure out what you’re doing in your garden this year!  A few hours of planning now will mean many fewer hours of frustration later in the season.  Besides sitting in my comfy chair with a cup of tea, lapful of cat and stack of seed catalogs, this is one of my favorite ways to spend “gardening” time in the winter. 
Arlo helping...

Last night I went to a great presentation by a farmer friend who reminded us all how important it is to know what you’re working with before you get started.  This means knowing how much square footage is available in each of your beds or planting areas, where the coldest and warmest spots are and where the wind whips through, breaking plants and shredding the plastic off your hoop house.   It means knowing the path of the sun through your garden, knowing the soggy and dry spots.   It means... making a SITE ANALYSIS!

This can be as simple or complex as you like.  You can do a detailed scale drawing, or make a list.   Or something somewhere in between.  But, do something so you know what you’re working with.
This shows most of the info needed to decide where to plant--the vegetable garden ended up on the slope.  It gets full sun and drains quickly.  You don't  have to draw your entire property--just the part you're going to use. 

Once you know what you have, do some dreaming and figure out what you WANT.  This is the easy part...  What vegetables do you want to grow?  How much of each one can you handle?  Will you be eating everything fresh, or will you be putting food up for the winter?  When do you want to harvest?  If you’re planning a 3 week vacation in August, that would not be the ideal time for all the beans to be ready, now would it?  Temper your dreams with a little reality—will you have help, or is this your private project?  How much time will you have in the garden?

When you know WHAT you want to grow, do your research to find out what those plants want—how much space, how much water and fertilizer, what kind of soil conditions...  in other words, the cultural requirements of your plants.   Pay close attention to how long it takes for each variety to mature—if you’re starting from seeds, don’t forget to count the time between sowing and transplanting. 

Group plants that need the same conditions together—it will be easier on all of you.  Count backwards from your hoped-for harvest date to know when to start your seeds or plant your transplants.   Consider soil temperature and moisture content, remembering that depending on the weather and your topography, it may still be frigid and soggy until June some years.   Make plans—including a plan B, just in case...

I like to make a chart or calendar to keep me on track, so I know what I’ve decided I’m supposed to do on a given day or week.  There is also a lot of garden planning software available on line, if you’re so inclined. 
List everything you plan to grow and then fill in the dates


These beds are all different sizes--not the easiest way to do it,  but how it works on this piece of land.  A chart like this makes it easy to know what's where and is really helpful for planning crop rotations.

So, as soon as the sky clears, go on outside and measure your garden beds!  Take pictures and walk around, remembering where the snow lasted the longest and where the tomatoes ripened the earliest last year.  Make notes or draw it on your garden plan, but keep track!  Then settle down with that tea and the catalogs to dream a bit... 


Monday, May 28, 2012

Growing Carrots

Daucus carota, Bugs Bunny’s favorite food, is a garden staple and not very difficult to grow if you understand and accommodate its needs. 

Carrot plants aren’t actually all that fussy, but to develop the long straight roots we want, do require some specific conditions. 

Because the root is what we’re after, it’s always best to sow your carrots directly into the soil they’ll mature in.  It’s very difficult to transplant seedlings without some minor damage to the tap root and that shows up as deformed roots later on. 

These carrots need to be thinned!
Carrot seeds are tiny and the seedlings are very fragile, so it’s essential that the soil remain very soft, open and consistently moist while they germinate.  Carrot seeds germinate best between 45F and 85F.  In the PNW, that means we usually do our first sowing in April, when the soil starts warming a bit.  They’re irregular in their germination—some pop up in a few days, others seeds sit and wait for a couple of weeks before breaking the surface of the soil.  Because of this irregularity and because it’s really hard to drop just one of those tiny seeds at a time, most folks sow relatively thickly and then thin the plants to about 1-1/2” apart.  Growing carrots too closely together causes the roots to become misshapen and sometimes entwined with one another.  Unless you’re planning to post pictures of your bizarre carrots on Facebook, you should give them a little room to breathe…

Once they’re up and growing, carrots don’t need much.  They’re rather light feeders and prefer a light, lean soil over a richer, heavier mix.  Too much fertilizer can cause the roots to get “hairy”, with many little feeder roots extending from the main tap root.  Unattractive, but not harmful.  Give them consistent moisture and if the crowns (the top of the root where the leaves begin) start to show above ground and turn green, cover them with a bit of soil or mulch.  Pull them when they color up and get to the size you want. 

A June/July planted crop of carrots in very well draining soil can stay in the garden over the winter if mulched with straw or shredded leaves.  Like most plants, they get a bit sweeter with the cold.  Carbohydrates converted to simple sugars as a response to lower temperatures act as a natural anti-freeze within the plant’s tissues. 

The main pest of carrots in our area is the carrot rust fly.  The females lay their eggs in the soil around carrot family plants and when the larvae hatch, they wiggle over to the roots and burrow in.  The lovely little white maggots chew around in the root, leaving rusty brown trails.  The carrot is still edible after you cut out the bad spots, but will not keep as long in storage.  The best way to foil these pests is to grow carrots under floating row cover, either laid directly over the plants, or over low hoops.  Whichever way you do it, be sure to completely enclose the plants—the flies are small, attracted by the scent of the plants and really motivated!  Keep the plants covered all season as there are several generations of the flies born each summer. WSU's Hortsense website has some good info about these annoying little guys.

Carrot Rust Fly damage.
Photo by Eric Sideman, MOFGA
If you think carrots only come in bright orange, you’re in for a treat.  Orange, yellow, gold, white, red and purple are all available.  And since each color is formed by a different combination of phytonutrients, a variety of carrots in your garden means more nutrition on your plate!  Here are a few varieties that I’ve grown and liked.  My family tends to like very sweet carrots eaten fresh or steamed.  We don’t juice them, so I don’t know how well they’d do for that.

A mix of colors from Irish Eyes Garden Seeds
 Orange
Scarlet Nantes
Nantes generally refers to a group of carrots that are very crisp and sweet, about 6” to 7” long and more cylindrical than tapered.  Just about every seed company sells some strain.  My main crop is always Scarlet Nantes.
Nelson and Yaya
Hybrid varieties of Nantes, these are both quite reliable and yummy.

Yellow
Yellow Solaris  
Light yellow, with a very sweet flavor.  They can get quite big when overwintered, but they seem to form cores and start to bolt earlier than others, too.
Yellowstone
 More golden than Yellow Solaris, with a deeper flavor. 

Red
Nutri-red
Dragon, from Irish Eyes Garden Seeds

I haven’t had tremendous luck with these—the slugs got almost all the seedlings as they came up last year.  But, they sound great and I’m determined!  If you’ve grown them, let me know what you thought.

Purple
Dragon
These are smaller and not as crisp as some, but have a really nice spicy taste.  And they’re gorgeous—purple on the outside, with little flecks of orange.  The inside is bright orange or even yellow, so they look really cool when sliced.


Scarlet Nantes, 2006


Have fun and let me know how your carrots turn out this year!


Saturday, April 21, 2012

Eating from the Garden in April


We are soooo lucky in the Pacific Northwest!  For lots of reasons, but in particular because we can grow so much food over the winter.  This week, we’ve eaten carrots, parsnips, cauliflower, Purple Sprouting broccoli, parsley, chives, sorrel, thyme, rosemary, oregano, kale, Swiss chard, arugula and beets out of the garden.  And I’ve discovered that as much as I love kale anytime, my favorite season for it is spring!  Not the leaves, but the luscious little flower buds, or raab. 

Purple Sprouting Broccoli, planted last July, eaten this week.
We’re used to eating the immature flowers of the Brassica family—broccoli and cauliflower heads are just unopened flower buds.  But even varieties grown primarily for their leaves produce these yummy little treats.  Best of all, they’re available when most of the other food from the garden is either running out or not ready yet.  The Purple Sprouting Broccoli and some overwintering varieties of cauliflower and cabbage are maturing, but it’s nice to be able to get a few last fabulous harvests off of the plants you thought were ready for the compost heap. 

Tuscan/Dinosaur Kale
Most of the members of the Brassicaceae family are biennial, meaning they grow leaves their first year, then flower and (usually) die the second.  They need the cold of winter to produce flowers and seeds.  Starting in late winter, they begin to elongate and send out shoots with buds that look like tiny broccoli heads.  Depending on the variety, these are either incredibly sweet (kale) or have a stronger flavor of whatever they are like in the summer (arugula and cabbage.)  The plants are determined to make seeds, so the more you pick the flower buds, the more they produce.  The flavors are mildest when the flowers are still buds, but still tasty when completely open.

Russian Kale really going to seed.  It was about 8' tall!
I’ve been growing a variety of Russian kale for several years, saving seed and selecting for the plants that are the most vigorous and the most aphid-resistant.  The first year was an accident, really.  I knew you could keep the kale plants through the winter, cutting leaves as needed.  Then a weird thing happened in February that year—the plant got HUGE and started making flowers!  A gardening mentor told me to try eating those flower buds and I was hooked.  Now I always let at least one plant go to seed completely although I rarely use the seeds myself.  Enough germinate on their own in the garden to keep us in kale all year.  We pick and eat the flower buds from the other plants for several weeks.  I like to just steam them like broccoli, or use them in salads.  If I don’t eat them in the garden long before they ever get to the kitchen… 

Brussels Sprouts
Some favorite cole crops to let flower:
Russian kale (red or white)
Tuscan or Lacinato (dinosaur) kale
Brussels Sprouts (Long Island Improved, Rubine and Franklin Hybrid this year)
Arugula (The opened flowers are beautiful and surprisingly sweet!)
And a brand new plant (to me):  Spigariello!  My friend Annette gave me some seeds last summer. I have to admit, I wasn’t too excited about the long stringy leaves, but let it go overwinter.  Its flower buds are the sweetest of all the plants in the garden right now!  The seeds I have are from Nichols Garden Nursery, but they're not offering them this year.  Terroir Seeds has a description on their website.

Spigariello--most of the flowers have been cut,
but it's making more everyday.


Wednesday, April 11, 2012

When is the Best Time to Plant Peas in the Pacfic Northwest?


Every year, that first bite of fresh peas from the garden makes me do the “happy food dance” right out in the open.  We’re partial to shelling peas in my house, so the anticipation of splitting open the pod to see if the seeds are full and plump, or if I’ve jumped the gun (I always do, at least a few times) is part of the fun. 

This year, I’m expecting that first mouthful to happen by the end of May, assuming we don’t have any major blizzards between now and then.  I planted peas into the garden March 2nd.  Even though I pre-sprouted them, the soil was still only about 48 F, so they just sat there, sulking for several days.  I’d about given up and went out with more seeds to try again on March 12th.   Sure enough,  there were their little green noses, sticking up out of the ground!  Like most plants, they grow more quickly in warmer weather, but now that they’re out there, they can take advantage of every sunny hour. 


Can you see the tiny babies peeking out?  (Ignore that dandelion, please!)


Peas are definitely cool weather crops and can withstand light frosts without a problem.  They will germinate in moist soil as chilly as 45 F, but it’s a slow process and risks rot and predation.  Although they appreciate consistent moisture, water-logged soil encourages fungi that attack and can kill.  Raised beds can help, as can making sure you have plenty of organic matter in the soil.  The trick is to get them up and going as early as you can to ensure the longest harvest time before the weather gets warm and dry.  Before the weather gets warm and dry…yeah…  ok, so last year the peas continued to produce into August!  Most years, they start to decline and succumb to enation virus or powdery mildew well before that. 


Here they are yesterday.  There's chicken wire about
2" above them.  I like to leave a little room to get in there.

By soaking and pre-sprouting the seeds, you can get a head start on germination, especially if the soil is still below 50F at the surface.  Place the seeds in resealable plastic bags or something similar with a little water or a very damp paper towel and keep them somewhere warm for a couple of days, checking often.  As soon as they start to germinate, open the bag and get them into the ground.  Be very careful of that brittle little sprout! 

Peas are in the Fabaceae family and most of that group are referred to as “Nitrogen Fixers.”  They form a symbiotic relationship with specific rhizobium bacteria.  The bacteria colonize the roots of bean and pea plants, absorbing some nutrients and in return, capturing and “fixing” gaseous nitrogen from the air in the soil.  The plant uses some of this nitrogen to create chlorophyll, which it needs for photosynthesis.  It’s a good idea to inoculate your pea seeds with this bacteria before planting, since it’s not generally present in great enough quantities in most garden soils.  It’s usually available from nurseries and seed catalogs in small packets.  I've seen greater vigor and higher yields when I've inoculated the seed.

Plant peas 1” to 2” deep, depending on your soil type.  Heavier soils make it more difficult for the seedling to emerge, so lean towards the 1” depth in soils with more clay.  Peas rather like company, so plant them about 1” apart. 


You can barely see the chicken wire supported by PVC
over rebar here.  This variety is called 'Alderman Tall Telephone.'
It takes longer to mature, but is one of my favorites.  Those are
potatoes below.
Pole, or climbing varieties need some sort of trellis for support, since some of them get upwards of 6’ tall.  Peas use tendrils rather than twining, to climb, so chicken wire or similar mesh materials work better than the bamboo poles often used for beans.  Do remember to put up the trellises BEFORE you plant your peas so you don’t have to work around them later.  Bush varieties will just clamber up each other and form a dense clump.   Planting them in rows a little farther apart with just a little support may make it easier to get in there and harvest the pods. 


Last year, I tried using twine and bamboo poles as a trellis.
It worked pretty well, but I made it too short--the plants
flopped over the top after awhile.


So, once your soil is workable and above 45F, pre-sprouted or not, inoculate your pea seeds and get that first crop into the ground!